Our Delicious Food

International Cooking at Home with Karin and Bruce Boschek

Category: Uncategorized

Sautéed Brussels Sprouts

There seems to be a general idea that Brussels sprouts need to be boiled or steamed before they are eaten or further prepared. In fact there are a number of different ways to prepare this universal vegetable. There are some wonderful recipes for baking them and they can even be pureed. This last week we had some nice sprouts and we remembered another way to prepare them, sautéing them with speck, thyme and onions.

We began as usual by washing, peeling off the outer leaves and cutting off the base of the sprouts, then cut them lengthwise in half.


Ingredients  for 6 servings
2½ pounds Brussels sprouts, trimmed
4 slices bacon, cut into 1-inch pieces (alternative: 150 g speck or pancetta)
1 tablespoon extra-virgin olive oil
1 large onion, diced
4 sprigs thyme or savory (or 1/8 tsp dried)
1 teaspoon salt
Freshly ground pepper to taste
2 teaspoons lemon juice (optional)

Instructions

In a large frying pan (we like cast iron) heat the oil over medium heat. Add the Brussels sprouts, onions, salt and herbs and sauté for about 15 minutes or until the sprouts begin to soften. Stir regularly and reduce the heat if the vegetables begin to burn.


Add the bacon and continue sautéing until the sprouts are soft (another 5 to 10 minutes). Sprinkle the lemon juice (if using) over the sprouts, stir and correct the seasoning with salt and pepper.

These were so tasty we had them as a main course, however they would also serve well as a side to any meat dish.


Classic German Baking and Classic Italian Baking


This hazelnut and chocolate cake is a classic in Germany, called “Nusskuchen” and in Italy where it is known as “Torta Gianduja.” The recipes are identical, combining the perfectly matched flavors of hazelnuts and dark chocolate. We have followed the original recipe for the cake, but have added some chunks of baking chocolate to the dough and chopped walnuts on top of the chocolate frosting. The recipe is simple and the cake keeps well if packed in aluminum foil after cooling. It seems to get better from day to day. One can also flavor it with rum or rum aroma.


Hazelnut Cake or Torta Gianduja


Standard 1 lb. loaf pan 8.5″ x 4.5″ buttered and floured

Ingredients

For the batter:
4 oz. (100 g) ground hazelnuts
4 oz (100 g) chopped and roasted hazelnuts
2 oz (60 g) baking chocolate chunks
1 cup (225 g) soft butter
1 cup (200 g) white sugar1 tl vanilla extract (or beans from one pod)
1/4 tl salt
3 L eggs
1-1/2 cup flour
2 tl baking powder

For the frosting:
4 oz (120 g) 70% dark chocolate
2 oz (60 g) milk chocolate
1 TBl butter
A handful of chopped walnuts for the topping

Instructions

Preheat the oven to 360 °F (180 °C)

1) Cream the butter with a hand mixer. Slowly add the sugar, salt and vanilla and continue creaming until well combined. Add the eggs one at a time and beat at highest speed for 30 sec. each.
2) Combine the flour and baking powder with the ground and chopped hazelnuts and add to the butter mixture in two portions, mixing at medium speed.3) Transfer the batter to the prepared form and place in preheated oven. Bake for 60 min, covering with foil if top begins to burn.
4) Place on a wire rack and allow to cool in the form for 10 min, tip the cake out of the form and allow to cool completely on the rack.
5) When the cake has cooled prepare the frosting by breaking up the chocolate and melting with the butter in a water bath (bain marie). Do not hear the chocolate over direct heat or it will curdle.  Pour the frosting over the cake and using a knife or spatula spread it evenly as it cools. Sprinkle the chopped walnuts on top and allow to cool.


We have been enjoying this cake with tea or a latte macchiato for breakfast and in the afternoon on these cold winter days.


Time for a Seafood Curry

The fact is, we live about as far from the ocean as is possible and still be in Europe. We do have some very good fish merchants here and they do their best to provide us with what is as fresh as possible from the sea, but when it comes to shellfish and other seafood we generally have to resort to frozen products. Some of these are very good, however, and they have the advantage that we can keep them on hand in the freezer.

20160326_210521

20161115_174700
20160617_171016

This time we had some lovely diver caught scallops and large shrimp tails so we made a wonderful curry. I don’t remember where the idea came from, but we added a bit of this and a bit of that and it turned out wonderfully. Here’s how we made it:

Mix 1/2 cup plain yogurt with 2 tsp cornstarch, 1/2 tsp salt one finely chopped garlic clove. Put  8 scallops and 6 large shrimp tails in a bowl with a Tblsp curry powder and 1/2 tsp salt and mix well. Heat 2 Tblsp olive oil in a skillet, add the scallops and shrimp and cook for 4 or 5 min, turning to brown on all sides. Transfer to a plate. Add a Tblsp of oil to the pan, turn the heat down and stir in 1/2 lb halved cherry tomatoes and 6 chopped scallions. Cook until tender, about 5 minutes. Return the scallops and shrimp to the skillet, add the yogurt mixture and heat through to cook and thicken. Serve with finely chopped green coriander (cilantro) over basmati rice.

20160326_210833

What a delicious treat. A nice, cold chardonnay goes very well with it and a light fruit sherbet would make an appropriate dessert.


holz

ANOTHER DELICIOUS PEAR PIE RECIPE

birnen_01

The autumn weather is upon us here in central Europe and with the the season for sniffles and sore throats. It has been a long time since I had a real cold, but I have one now. No fear, however, you won’t catch it by reading my words here.

A few weeks ago we had some more beautiful pears and I remembered a recipe that was given to me some time ago. I was curious about it because it is exceptionally simple and quick, but I had been assured that the results were worth making it, so I set to peeling and cutting the pears in half, removing the core and preparing a pie plate with a crust made from pie dough I had in the refrigerator.

pears
pear_pie_02

It only takes a lower crust, the pear halves get spread on the bottom and a custard is poured over the pears before baking. Voilá! The results are wonderful. For instructions see the recipe archive.

20161017_205926


pear_01

HOW WE PREPARE PESTO ALLA GENOVESE

We made another big batch of pesto recently and Karin took many pictures of the process. It is not difficult, but it may be useful to show the steps. As I noted in the recipe archive we use mortar and pestle because we prefer the smoother texture than is possible with a food processor. It’s also a lot of fun to beat the nonsense out of a bunch of basil leaves and pine nuts and finally, the name, pesto, derives from the pounding action of the pestle.

We are going to make pesto alla Genovese here, which means using a good bunch of basil, some pine nuts and two hard Italian cheeses. There are many other varieties and you can use your imagination, for instance replacing the basil completely or in part with flat-leaf parsley, or using rocket (rucola, salad rocket, arugula, rauke) or spinach, and walnuts, almonds or pecans). You can also try other varieties of cheese, however only very firm, dry cheeses can be recommended. We have made some very nice pesto using nut oils, too.

To begin with it’s always a good idea to have all the equipment and ingredients right in front of you.


20161003_123358

We need two big bunches of basil, garlic, olive oil, coarse sea salt, pine nuts, Parmesan cheese, Pecorino romano cheese. For the amounts you can look at the recipe in our archive, but the amounts do not have to be exact.

We also need a mortar and pestle, cooks knife and perhaps a spoon for tasting. If you decide to buy a mortar and pestle go for a larger diameter mortar. You will be thankful because it will be much easier to keep all of the ingredients inside and not on the counter top. We prefer stone or basalt as they are nearly indestructible, do not pick up flavours or odours and are quite inexpensive. Marble is lovely, but usually quite expensive and ceramic is easily broken. Wood is not recommended because it is so absorbent that it picks up flavours and gives them up again the next time used. Garlic flavoured chocolate is not everyone’s cup of tea.

20161003_124559
kaese
20161003_125650
oel_01

Chopping the basil coarsely makes the smashing process in the mortar considerably easier. The same applies to slicing the garlic.

Using a mortar and pestle takes some practice. The action is one of pounding and grinding. Not adding too much material at one time makes it somewhat less daunting a task and keeps it from flying out when bashing furiously. Speaking of which, the bashing is a great way to relieve inner tension and can be quite therapeutic. It’s also a way of connecting with the historical basis of cooking because the mortar and pestle have been used for food preparation for as long as 35,000 years.

Antonio Carluccio recommends beginning by smashing the garlic to a paste and then adding the basil and finally the cheese and pine nuts. I often do that, or I start with the basil as in these pictures. In any case you keep adding basil and garlic, then you can dribble some good olive oil in and begin a stirring action with the pestle. I like to use a peppery olive oil, but that is fully a matter of taste. When you have created an oily paste you can begin adding the cheese. Traditionally, a mixture of Parmesan and pecorino (from sheep milk) is used and you can’t go wrong if you stick with that. You can also just use Parmesan or try another hard cheese such as grana or even a year-old Gouda. This would not be wrong as Dutch cheeses were highly prized in Italy in the 18th and 19th centuries and were apparently often used in pesto. In any case an old Gouda adds spice to the pesto! You can keep adding cheese and oil until you have a smooth mixture and then begin adding the pine nuts. I don’t smash the pine nuts to a paste, but leave them as small chunks. Again, this is a matter of personal taste. The controversy of whether to roast the pine nuts or not is certainly also a matter of taste. I have stopped roasting them because I like the creamy consistency the unroasted pine nuts have when mashed, but the roasted add another dimension through the roast aroma. Try both and see which you like best, or do as we do and toss some roasted pine nuts onto the finished pasta. Add plenty of oil and put the pasta on to cook because your pesto is now ready to be enjoyed at the table!

20161003_135029

We hope you enjoyed this somewhat detailed discussion of this wonderful Italian specialty. Next week we will have some new recipes to share and hope you will join us then.

kranz_04


A Quick Pasta Delight

Sometimes things have to be quick. We love to cook and don’t shy away from more complicated recipes, but there are times when it is necessary to whip something together quickly. There is no reason not to make it delicious, of course! A surefire backup is pasta with pesto. We prefer pesto alla Genovese, made with basil, but you can use other herbs such as rocket or flat-leaf parsely.

We buy large basil plants when they are on sale in the summer and make large batches of pesto (our recipe is in the recipe section) and put them in ice-cube trays and freeze them. They last a year or longer in the freezer and only need to be thawed to be used. We usually freeze them without the cheese and add grated Parmesan and pecorino after thawing, however you can freeze pesto complete with cheese if you don’t plan on keeping it too long.

There are many wonderful uses for pesto, but the simplest is just to put it on pasta. We prefer spaghetti and we often add some freshly roasted pine nuts on our plates.

20160926_195558

Cool evenings call for comfort food!

20160910_195356


We have been enjoying marvelous weather with blue, cloudless skies and temperatures in the low 20s °C. In the evening, however, temperatures drop and we have had some 10 °C nights. This calls for warm dinners and we have plenty of good recipes, both tried-and-true and some new ones to try out.

One of our all-time favorites is a spicy pumpkin soup with ginger, chilies and cumin. We usually use a Hokaido pumpkin, which is especially suitable because you don’t need to remove the skin. There is, however, no reason not to make this with a butternut squash, giant pumpkin, musquee de Provence or other winter squashes. This is a very quick and simple recipe.


Spicy Pumpkin Soup


pumpkinsoup_01


Ingredients:

1 Hokaido (small Japanese) pumpkin, seeds removed, cut into 1″ cubes with shell

1 onion, diced

2 thumb-sized pieces of fresh ginger, peeled and finely grated

1 small fresh red hot chilli pepper finely grated or chopped

cumin, salt and pepper

2 Tblsp. sweet cream


pumpkinsoup_02
pumpkinsoup_03


Sautee onion, add pumpkin cubes and about 2 cups water

Add ginger, chilli, salt and cumin (about 1/2 tsp each or according to taste)

put on low boil for about 20 minutes, then puree, add about 3 Tblsp. cream, adjust seasoning and serve with chopped cilantro (coriander greens).


pumpkinsoup_04


We sometimes make up very simple little Moroccan spiced meatballs to put in the soup. To one pound of ground beef we add 1 – 2 tablespoons of ras-el-hanout or baharat (northern African spice mixtures), garlic, salt, pepper and dried chilies and fry in olive oil just until done through (about 10 minutes). Fresh baguette or sourdough bread make a perfect accompaniment.


A Tasty Broccoli Quiche


We especially like this recipe because it spices up the broccoli with pancetta and mozzarella. The recipe is simple and quick and is definitely worth making.

20160929_202441


kranz_04


Autumn Baking Adventures


basket_02

The first days of autumn

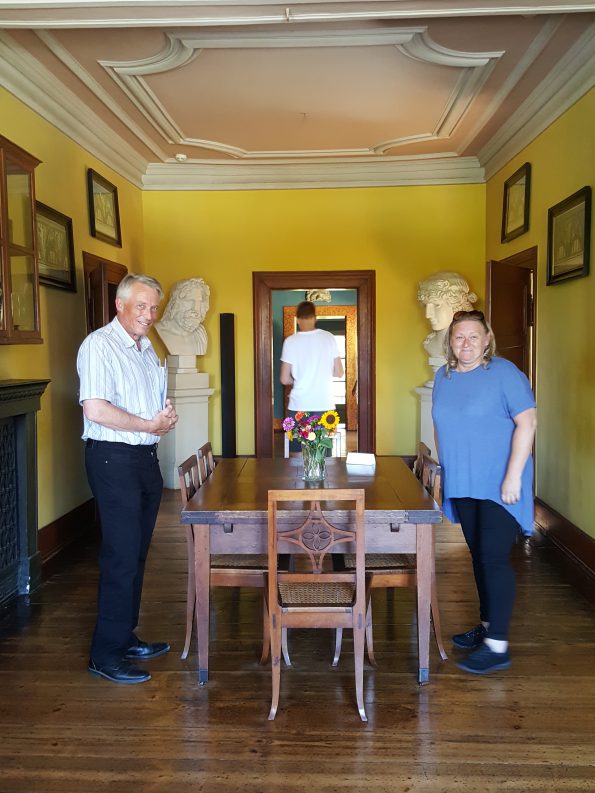
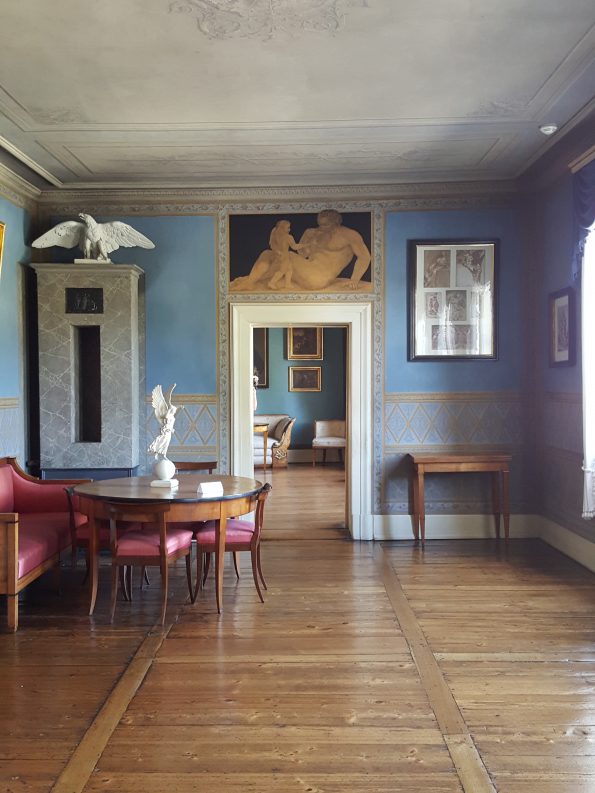
We had wonderful guests from Essex, UK and did some traveling and sight seeing with them. The weather was beautiful and unseasonably warm for September with temperatures in the 30s °C so we headed off to Weimar where we visited Goethe’s home and museum.

20160913_133223

20160913_131655

The next day we drove in to Alsfeld and walked around the beautiful, old historical part of the medieval town. It was still quite warm  and we treated ourselves to some ice cream creations at the Italian ice cream parlor in the middle of the town square.

20160914_155956

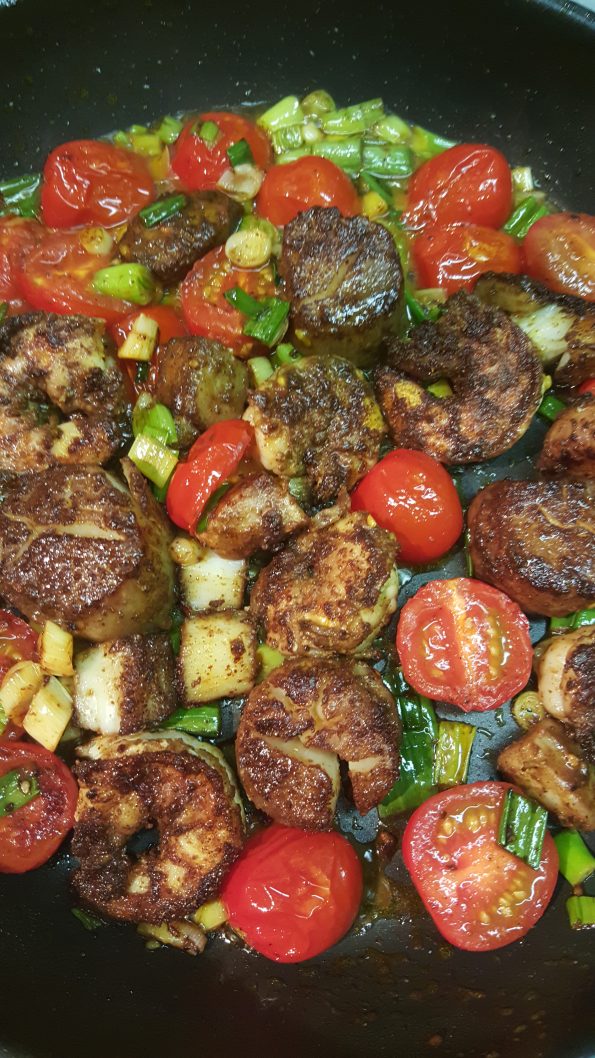
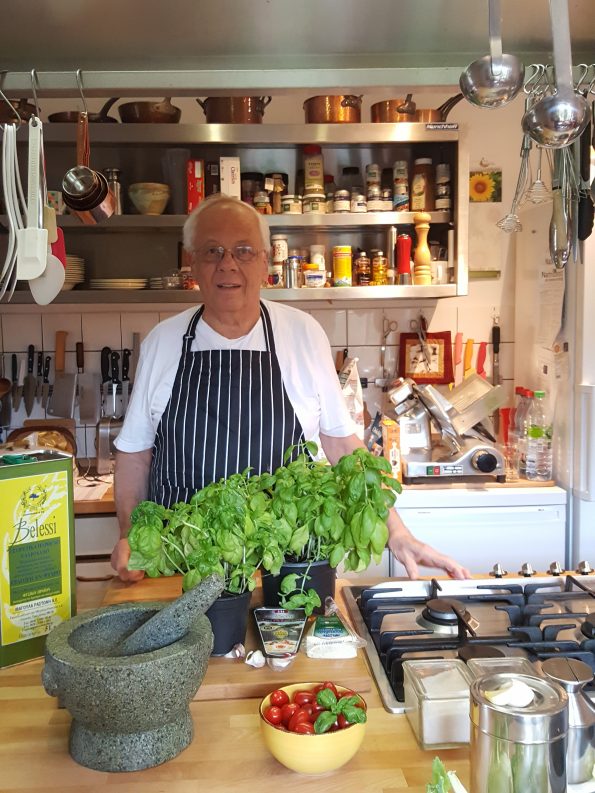
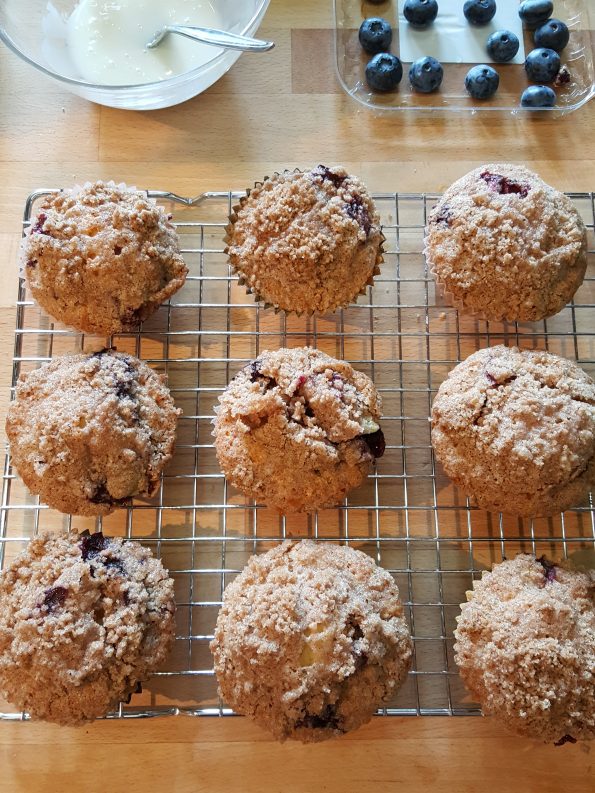
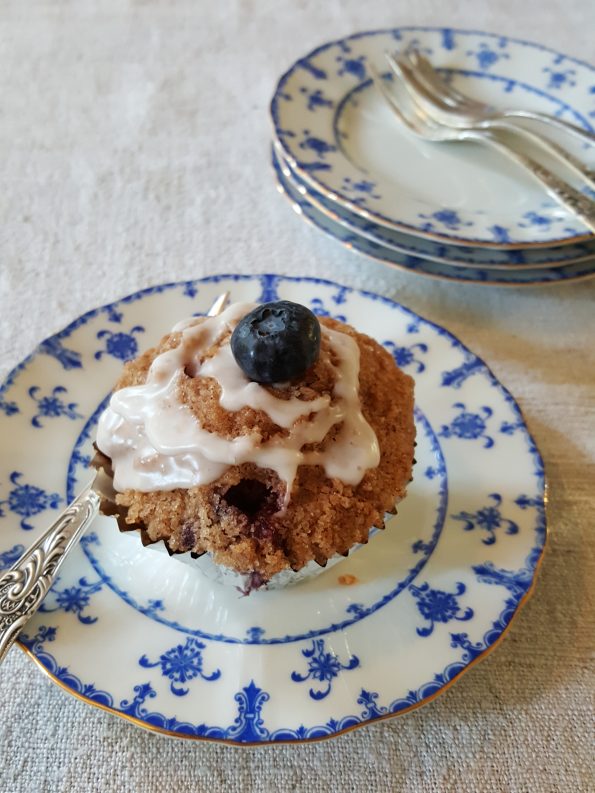
Having guests gave us a good opportunity to do some cooking, too. It was fun and as usual our guests spent much time watching and/or helping in the kitchen. Karin fixed a pork tenderloin in Gorgonzola cream sauce with wide noodles and, of course, we did plenty of baking including these gorgeous blueberry muffins with streusel topping.

20160912_164937
20160912_180910

Blueberry Muffins with Streusel Topping and Lemon Glaze

Ingredients

1 1/2 cups all-purpose flour

3/4 cup white sugar

1/2 teaspoon salt

2 teaspoons baking powder

1/3 cup vegetable oil

1 egg

1/3 cup milk

1 cup fresh blueberries plus some for decoration

1/2 cup white sugar

1/3 cup all-purpose flour

1/4 cup butter, cubed

1 1/2 teaspoons ground cinnamon

1 tablespoon lemon juice

1/2 cup confectioners’ sugar

Directions

Preheat oven to 400 °F (200 °C). Grease muffin tins or line with paper liners.

Muffin dough: Combine 1 1/2 cups flour, 3/4 cup sugar, salt and baking powder. Place vegetable oil into a 1 cup measuring cup; add the egg and enough milk to fill the cup. Mix this with flour mixture. Fold in  one cup of blueberries. Fill muffin cups to the top, and sprinkle with streusel topping mixture.

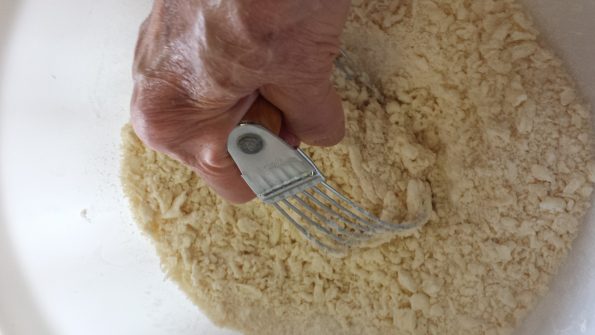
Streusel topping: Mix together 1/2 cup sugar, 1/3 cup flour, 1/4 cup butter, and 1 1/2 teaspoons cinnamon. Mix with fork, and sprinkle over muffins before baking.

Bake for 20 to 25 minutes in preheated oven, or until done (cake tester comes out dry). Let cool on rack. Mix lemon juice with confectioners’ sugar to make a thick paste. Drizzle over muffins, decorate with one or more fresh blueberries and allow to set.
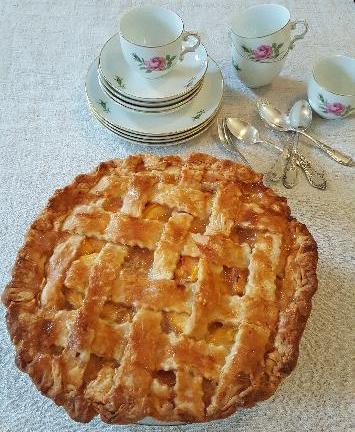
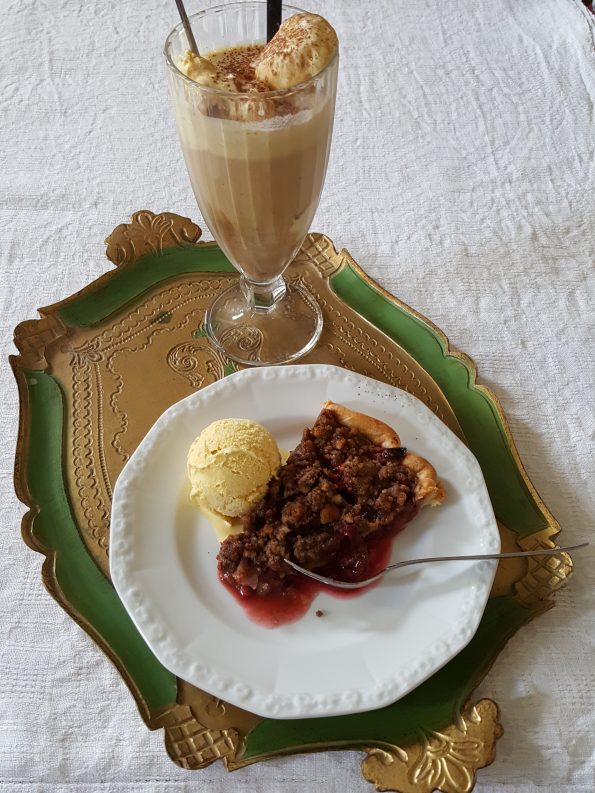
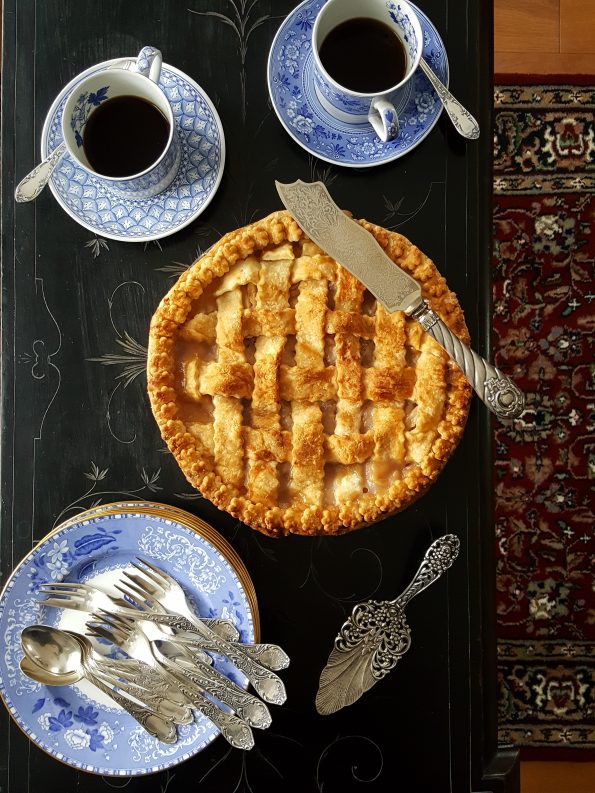
 

pear_01

Pear Pie

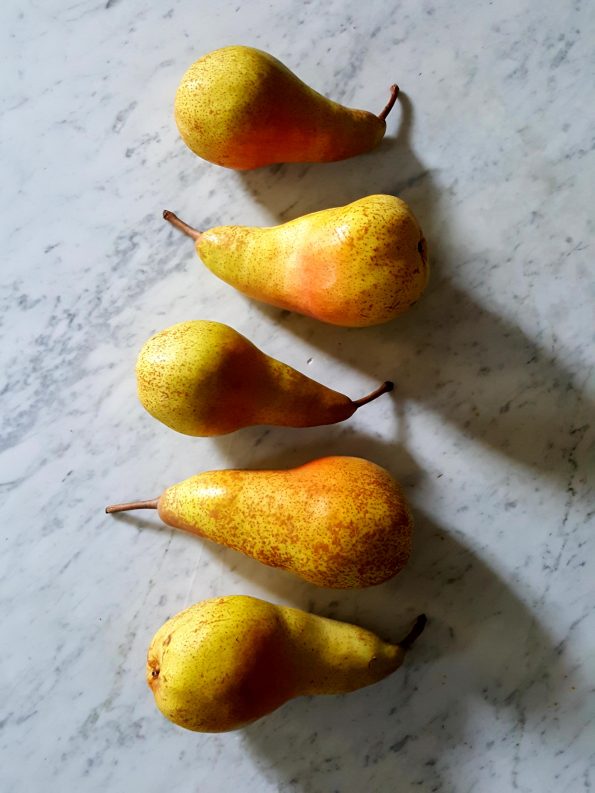
A few days after our guests left we were shopping and discovered some beautiful, ripe Bosc pears. These are firm and especially suited to baking so we decided to make a pear pie.

20160917_145010

I used my mom’s pie crust recipe, replacing the vegetable shortening (Crisco) with butter. I will add the recipe and some thoughts on making pie crusts to the recipe section soon. Here is the recipe for the rest of the pie:

A double pie dough recipe, enough for a 9″ pie plate top and bottom crusts. Divide the dough into two equal parts, form a disk of each, wrap in plastic wrap and refrigerate for at least an hour.

Pear filling

1/2 cup (115 g) sugar

1/4 cup (35 g) all-purpose flour

1/4 teaspoon cinnamon

1/8 teaspoon ground cloves

8 firm Bosc, Bartlett or Anjou pears—peeled, cored and sliced 1/2 inch thick

1 tablespoon butter

Glaze

1 tablespoon milk

1 tablespoon sugar

1 tablespoon butter, melted


Instructions

Preheat the oven to 450 °F (230 °C). In a large bowl, stir together the sugar, flour, cinnamon and cloves. Add the pears and toss to coat.

Roll out one of the dough disks for a bottom crust and line the plate. Coat the bottom crust with egg white or melted butter to keep it from becoming soggy.

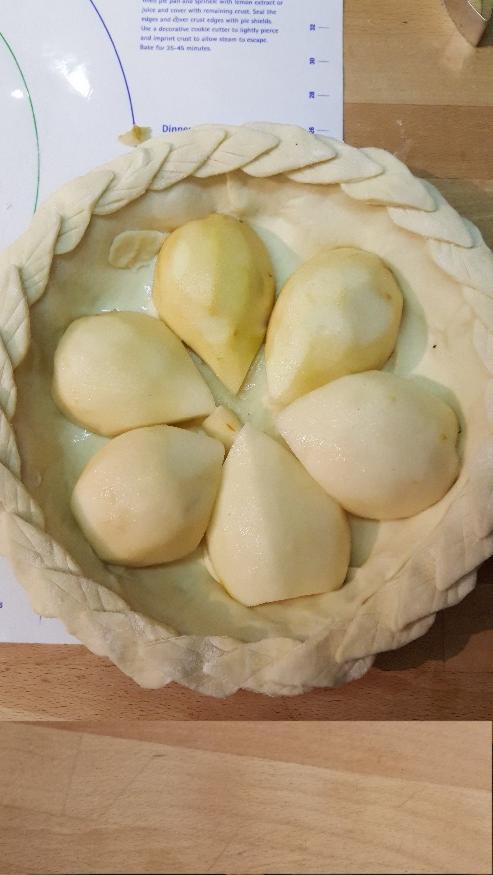
Transfer the pear filling to the pie pan and arrange the slices so there are no spaces. Dot the pears with the butter.

Roll out the second disk of dough to an 11-inch round and cut into strips with a knife or zig-zag wheel. Weave the strips over the top of the pie to make a lattice and seal the edges with decorative punched-out buttons of rolled-out dough. Alternatively, you can just roll out a simple crust and cover the pie with that, crimping the edges together with the lower crust. Don’t forget to cut slits in the crust to allow steam to escape.

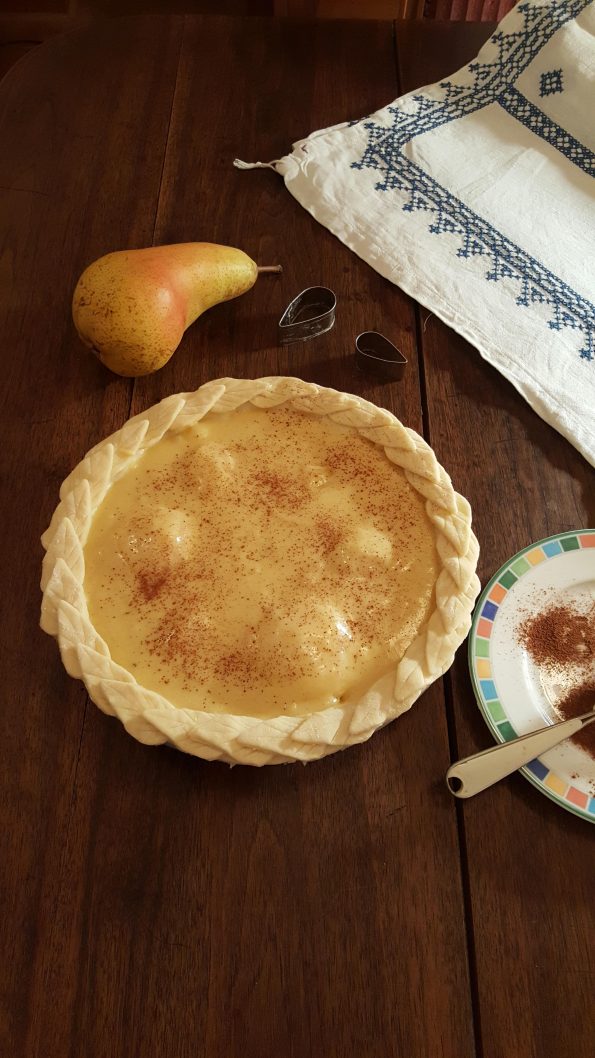
Mix the milk, sugar and butter and brush this glaze over the pie. Bake in the hot oven for 10 minutes, reduce the heat to 350 °F (175 °C) and continue to bake for about 50 minutes or until the crust is golden brown and the filling begins to bubble through the lattice or vent slits. Let the pie cool on a rack, about 3 hours. Serve warm or at room temperature.


pearpie_01

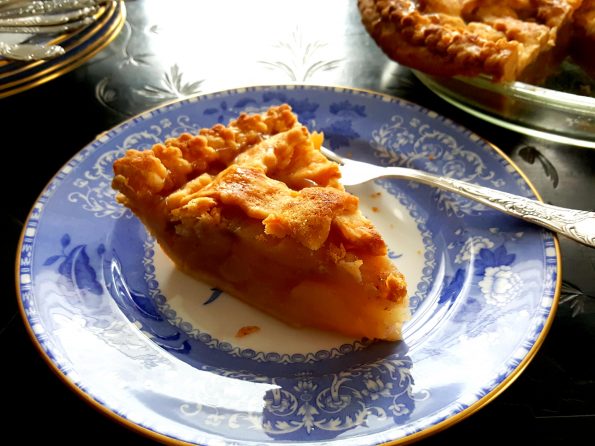
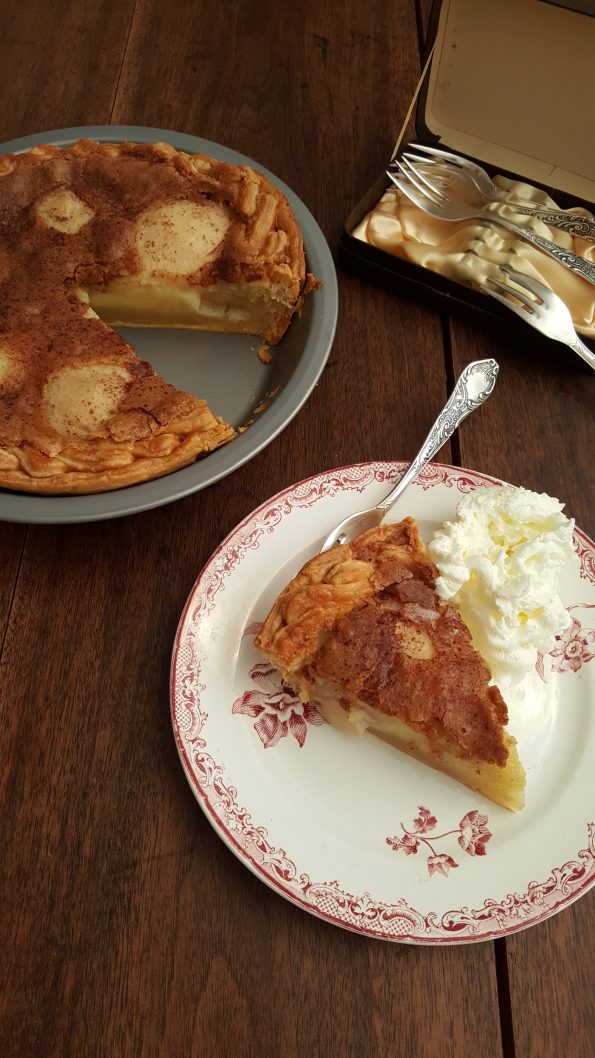
We enjoyed half of the pie and gave the other half to our friends. It was very good with vanilla ice cream or with whipped cream.

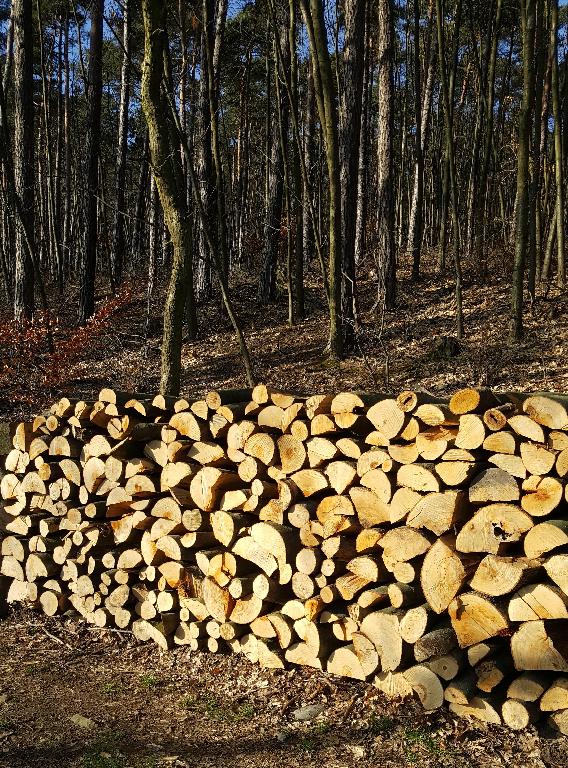
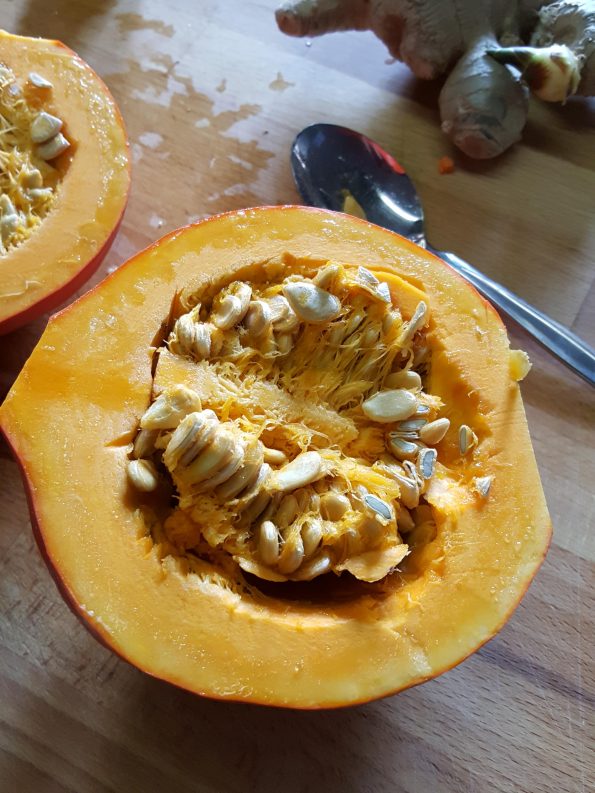
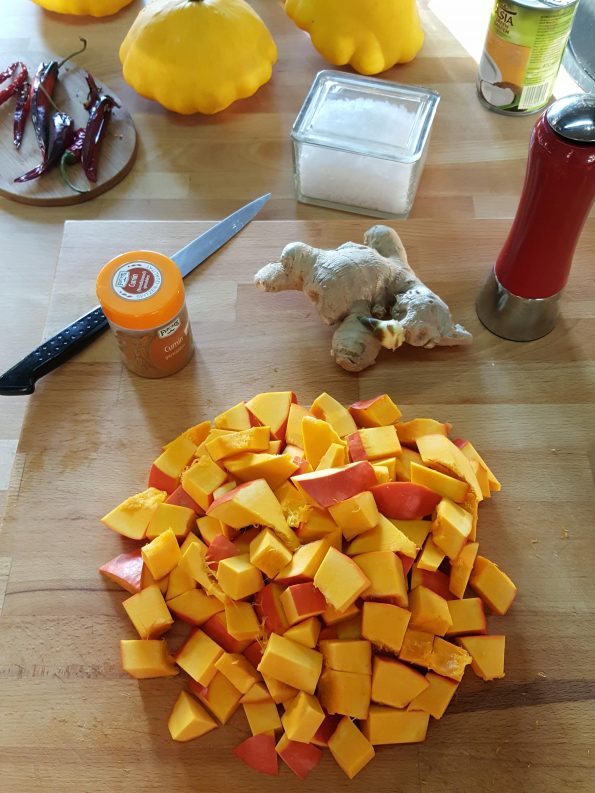
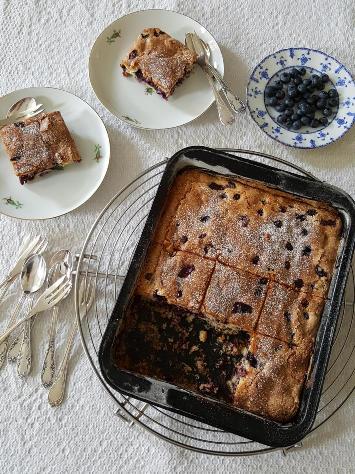
Now that autumn has arrived, the temperatures are sinking and all of the wonderful fruits of the autumn harvest will be available there will be ample opportunity to do some comfort food cooking. We’ll be sharing some of our standard recipes and trying out some new ones. It’s going to be an exciting time! Thanks for joining us.

 kranz_04

Fruits and Berry Time

Basket_01

I had no real plan for how often I would make an addition here, but I will try to get something in every week. It’s a bit of a challenge since we are still renovating/rescuing/rebuilding/restoring or 20+ room, 4-story, 115 year old home, but there is always something to report on. This last weekend we had guests and we made a peach pie. We bought 10 very nice, ripe peaches and I used my mother’s pie-dough recipe that I have been using for the last years. I don’t make enough pies to have the practice that makes bringing the dry and wet ingredients together the simple process it should be. A friend of mine suggested using the pastry cutter, not only to mix the flour and shortening, but to use it to bring the liquid into the mixture. It worked like a charm and I will do that in the future.

Pastry cutter

Once again I made up the recipe as I went along, using bits and pieces from here and there and I was generally very happy with the results. I did take notes so I can share the recipe here and in our recipe archive. One thing I might change, however, is not to use flour with the peaches, but rather use cornstarch. The flour made a rather dense “sauce” and I would have liked it to be a bit lighter. Nonetheless, the results were most satisfying and our guests enjoyed it with vanilla ice cream and a cappuccino.

PP_01
PP_02


Here is the recipe I finally used:

Peach Pie

Ingredients

Pastry for a 10 inch double crust pie

1 egg, beaten

8-10 sliced peeled peaches

2 tablespoons lemon juice

1/2 cup all-purpose flour

1 cup white sugar

1/2 teaspoon ground cinnamon

1/4 teaspoon ground nutmeg

1/4 teaspoon salt

2 tablespoons butter

Instructions

Preheat the oven to 450 degrees F (220 degrees C).

Line the bottom and sides of a 9 inch pie plate with one of the pie crusts. Brush with some of the beaten egg to keep the bottom crust from becoming soggy.

Place the sliced peaches in a large bowl, and sprinkle with lemon juice. Mix gently. In a separate bowl, mix together the flour, sugar, cinnamon, nutmeg and salt. Pour over the peaches, and mix gently. Pour into the pie crust, and dot with butter. If you wish to make a lattice crust as we did you can roll out and cut pastry with a zig-zag wheel or straight with a knife and lay out the lattice as usual. You can also just make a closed upper crust, but don’t forget to make slits in it to vent the steam. Brush the remaining egg over the top crust. Cut several slits in the top crust to vent the steam.

Bake for 10 minutes in the hot oven, then reduce the heat to 350 degrees F (175 degrees C) and bake for an additional 40 – 45 minutes, until the crust is brown and the juice begins to bubble through the lattice or the vents. If the edges brown to fast, cover them with a skirt of aluminum foil. Cool before serving. The pie tastes better warm than hot.


A Berry Nice Day


We saw some beautiful blueberries on sale and rather than making jam, we decided to make a cake. Looking around the Internet we found a recipe from “IRENED” on Allrecipes that sounded good. I’ll copy the recipe in the archive (see “Recipes” in the menu above). It turned out very well and I wouldn’t really change anything from the original recipe.

Blub_02a
Blub_03a

We enjoyed it with a cappuccino made from our own freshly roasted coffee, a blend of Colombian, Ethiopian, Sumatran and Honduran beans.

Summer finally arrived in Germany

We didn’t have much of a summer here in central Germany this year. June, July and the beginning of August were cool and rainy. Now in the last week of August it suddenly turned very warm with temperatures into the mid 30s °C. The warm weather is enjoyable, but the humidity also goes up and we find ourselves becoming rather lethargic. Nonetheless, we have been cooking and baking and having fun in the kitchen. Karin made her favourite couscous with vegetables on Saturday. Recipe in the Archive.

20160826_164734
20160826_205230


It’s “Zwetchgen” season in Germany. The beautiful, blue damson plums lend themselves perfectly to baking so I made a plum pie. I made up the recipe as I went and put a streusel topping on it and mixed some ground walnuts into the streusel. It was delicious with vanilla ice cream and an iced coffee, or Affogado on a hot Sunday afternoon.

20160828_165903

We made jam out of the rest of the damson plums and it turned out beautifully. We do not use gelling or jam sugar or add pectin, but cook until the thermometer reads 215 °F (108 °C) or “thread stage.” The flavour is far superiour in our experience, to jams made with additional pectin.

20160828_195510

As autumn approaches we will have many new cooking adventures with winter squash, them many winter Brassicas and of course, Thanksgiving dinner.

Logo