
Springtime is Pie Time
by Boschek
After an unusually long winter here in central Europe we find ourselves surrounded by the sights and smells of springtime. We can sit outside in the evening in short sleeves and enjoy our wonderful garden.
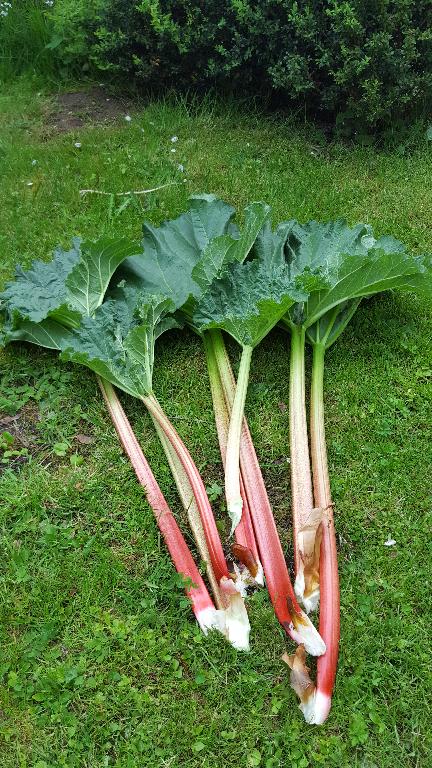

Although our yards are more like a park, we do have some fruits and vegetables including apples, pears, asparagus, chard and rhubarb. This last Sunday we picked some rhubarb and made a tarte tatin, which was very nice. Karin, the pie baker, decided on something different, however, a rhubarb and strawberry pie.
We’re using the rhubarb and strawberries here more as an example. There are endless combinations of delicious berries and fruits that will make gorgeous pies.
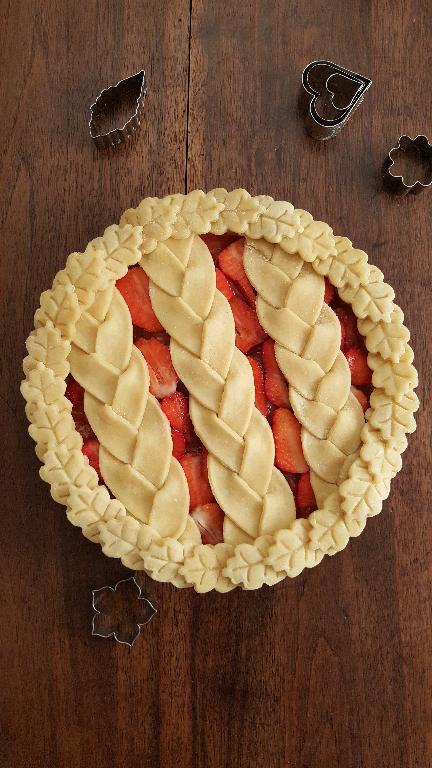
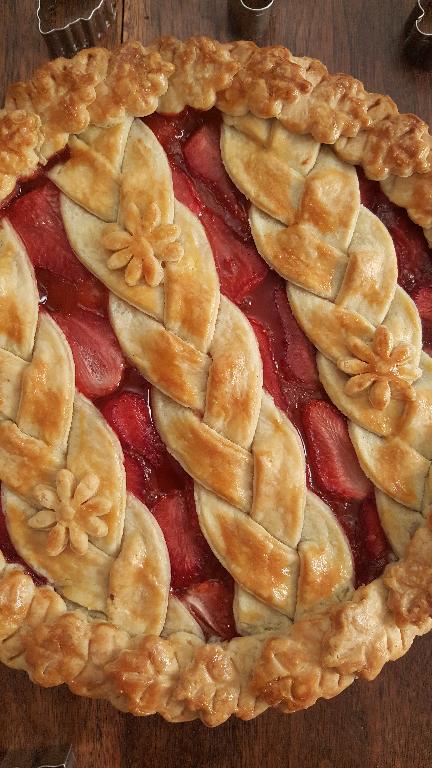
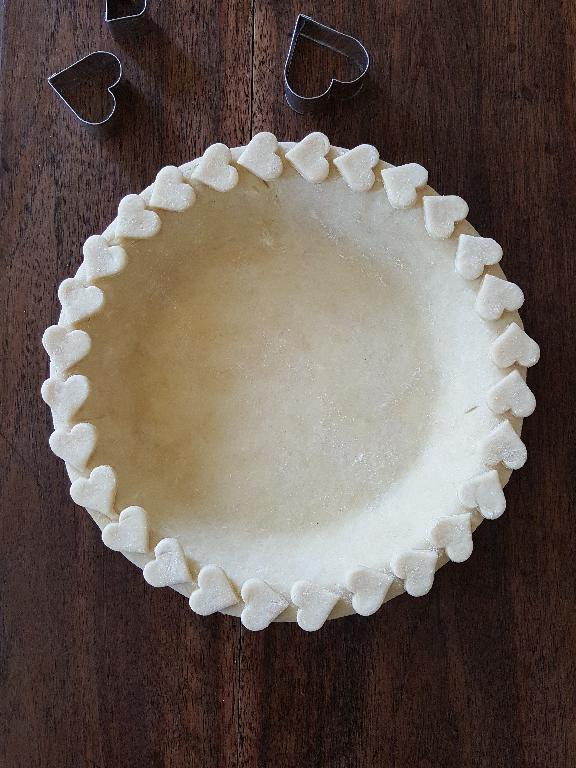
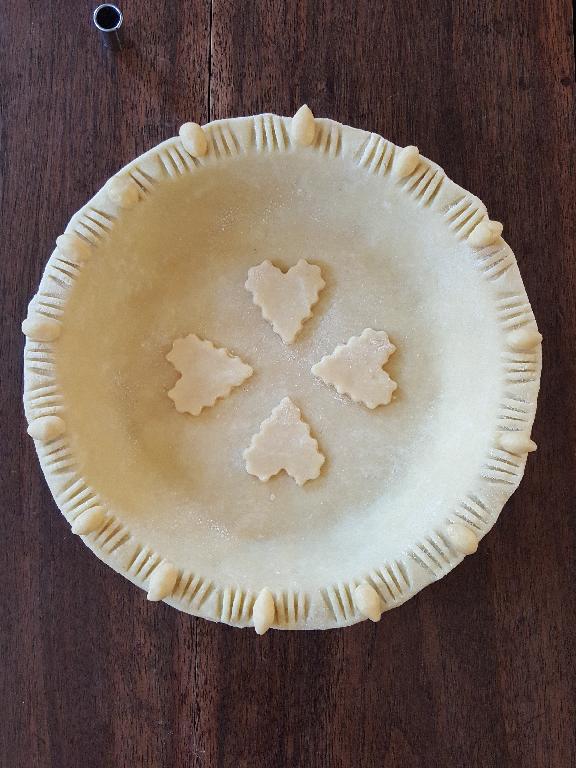
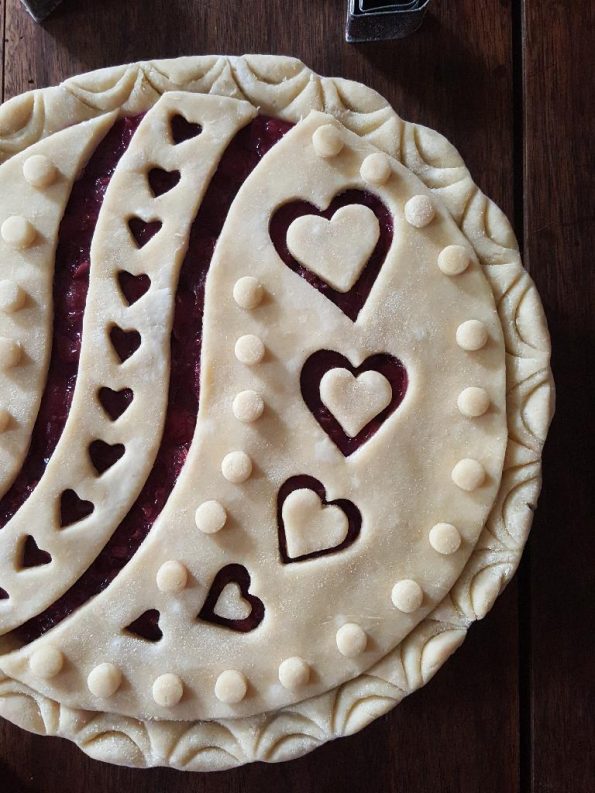
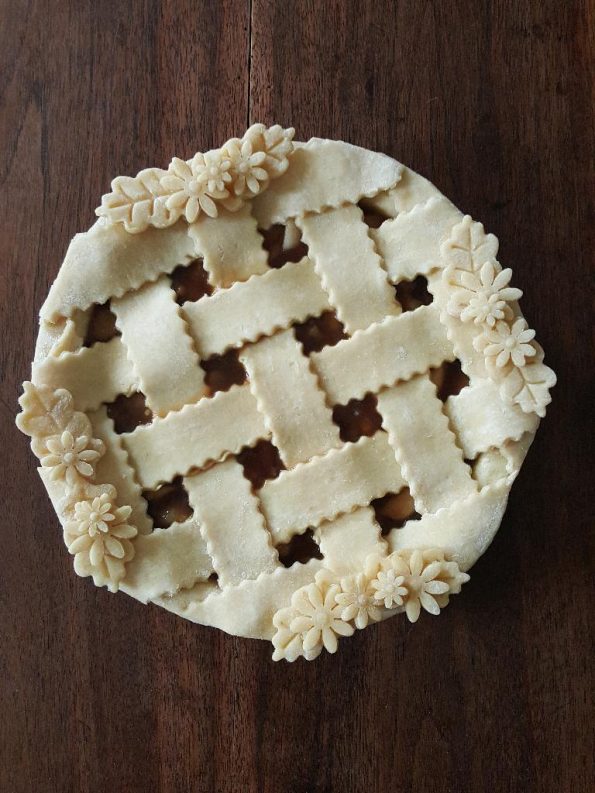
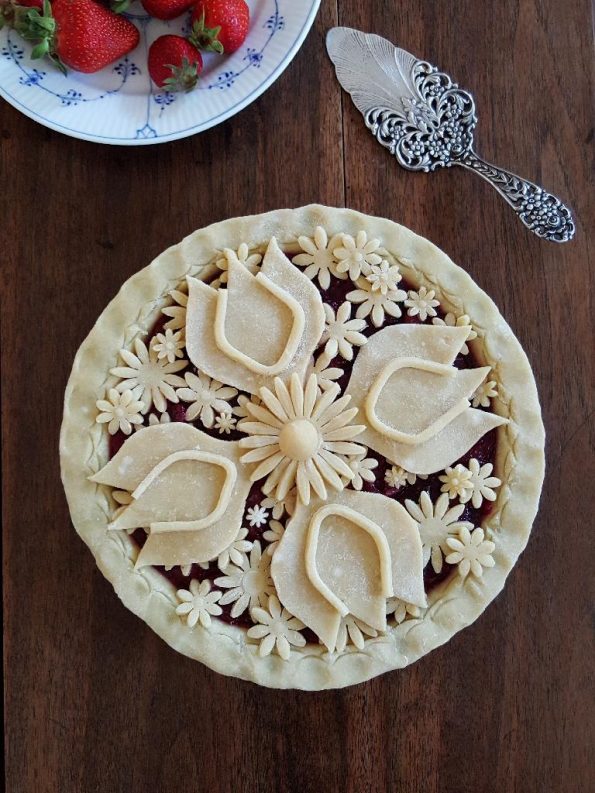
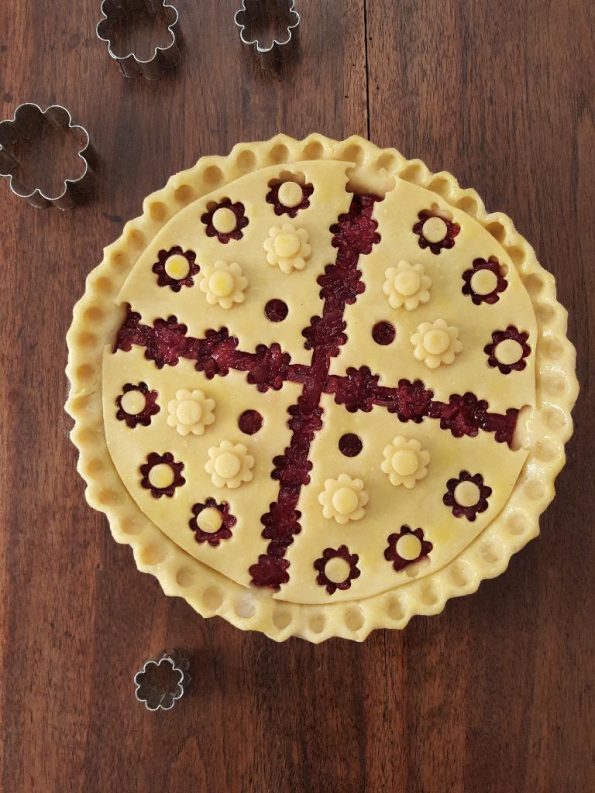
There are also almost endless possibilities for decorating pies. The braids above are just one and below is another example.
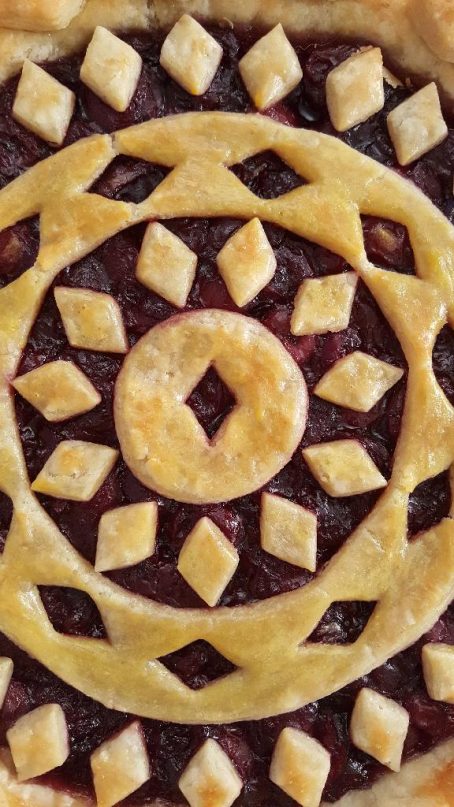
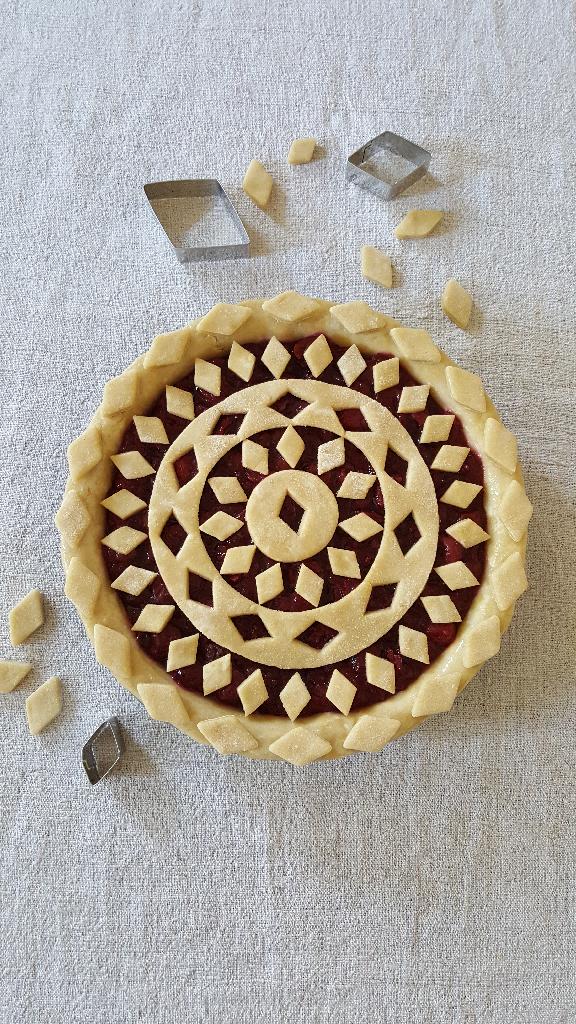
If you would like to have some more inspiration on decorating pies please go to Instagram and look at Karin’s page (karinpfeiffboschek). Let your imagination guide you and don’t be afraid to try out new and unusual designs. Do, however, try to be as careful and accurate as you can be.
The difference between a “nice pie” and one that is artistically pleasing is in the details. Notice in the pictures of the unbaked pies that every detail is nearly perfect. It takes time to achieve this and a warm kitchen makes it very difficult so that it becomes necessary to put the pie and the rest of the dough in the refrigerator once they become too soft. It is also useful to place the pie in the refrigerator before baking. This also makes it possible to bake the next day, if it gets too late in the evening.
The recipe we use for these pies is in the recipe section and describes in detail how to prepare the dough, both using a food processor and by hand.
Here is the recipe for the rhubarb and strawberry filling:
Filling for one 9″ pie
700g (4 cups) coarsely chopped rhubarb
200g (1 cup) white sugar
1/4 cornstarch
About 8 large strawberries or more if smaller – cleaned and sliced
1 egg separated
Method
Recipe for pie crusts in the recipe section.
Mix rhubarb, sugar and cornstarch in a pan, heat slowly stirring gently so the sugar does not burn. You can add a couple of tablespoons of water to get things going a bit. Heat until the rhubarb begins to soften and the starch thickens. Don’t overcook and stir gently so the rhubarb does not completely disintegrate. Let cool.
Preheat the oven to 200 °C (400 °F).
Roll out the bottom crust and line a 9″ pie pan. Brush egg white on the inside to keep the filling from soaking into the crust. Add the rhubarb filling, smooth out with a pallet or knife and place the sliced strawberries on the top.
Roll out the top crust and decorate , or make a lattice crust as desired. Add the egg yolk to the white and beat vigorously so the whole egg is smooth. Brush the egg on the surface of the decorated pie making sure to get an even coat on all parts.
Place on the middle rack in the hot oven. After 20 minutes turn down the oven to 175 °C (350 °F) and bake for an additional 50 minutes. If the upper crust begins to get too dark cover lightly with a sheet of aluminium foil.
Allow to cool on a wire rack and then take pictures to share with your friends on Facebook or Instagram! 🙂
Enjoy with vanilla ice cream or whipped cream.


What an amazing work, you are an artist.
Congratulations!!!
Regards from Punta Cana, Dominican Republic
Thank you for your kind words!
LOVE these beautiful pies.Bake crusts at 400, then reduce
To what temperature???
Thank you very much. Sorry if I forgot to say that the temperature is reduced to 350 °F.
I would love to see a post (and maybe video) giving tips on how to flatten the fruit so that you can cut the top crust evenly. In other words, derails on how to take a crust decoration from idea to fruition. For cake tops, I’m always creating powdered sugar stencils that honor specific occasions, and I make great woven pie crusts. But those long crust strips are very forgiving–they’ll rise and fall over fruit chunks. How do you get many even sharp cut-out over an uneven surface? I would enjoy reading those tips. Meanwhile, I’ll continue to admire your beautiful work! Thank you. Amy
Thank you. i’m sorry I did not see your comment. The main thing is to cut the fruit in thin slices not in chunks or cubes. You don’t have to do this for all of the content, but just for the top layer or two. Then the surface is flat enough to work with. Of course, you can also first lay down a solid crust and then decorate that, too. Again, thank you for your kind words.
I love your blog and recipes! Thanks for making our meals so much healthier and really delicious.
https://coolkitchenutensils.com
Such beauty! Would you ever consider making some of these crusts, freeze, and ship them – or even making them in clay?! I would love to have these on my kitchen wall! lol <3